Contact 1-800-466-1535 (250) 448-4670

Start Practicing Morning Meditation 101
February 16, 2021
Keeping a Gratitude Journal 101
March 1, 2021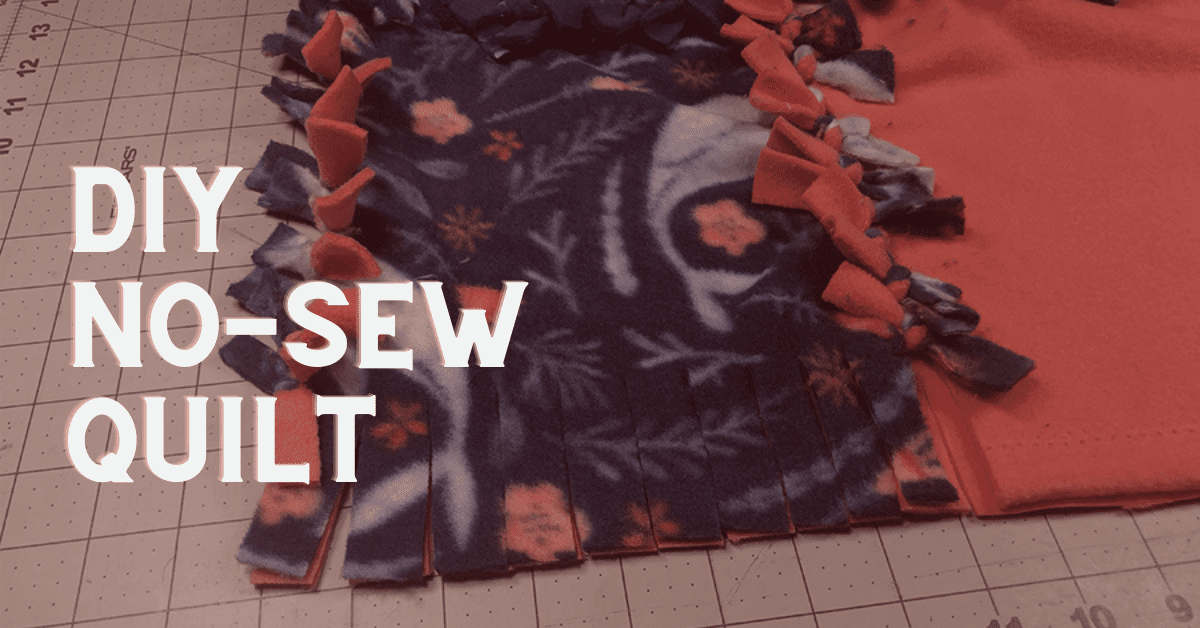
Jenny Melrose is a retired teacher who blogs about crafts and lives just outside of Charlotte, N.C.
You can follow her on Instagram at @melrosefamily.
This no-sew quilt is a great project. Quilts can be used for both cold and warm nights, depending on their construction. Many people like to use a number of quilts on a cold night. Here are instructions on how to make your own no-sew quilt, in less than 30 steps!
Materials
Please note that the fabric sizes listed here are for a 48” x 40” blanket. This is a good size for a small lap blanket.
For the fabric:
- Backing Fabric (52” x 44”) -this can just be extra fabric, no special material needed
- A mix of fabrics for the patches on the front. You’ll need enough to make thirty 12” squares total.
It’s always best to get a little extra because sometimes the fabric shifts on the bolt and it ends up being cut on a bit of a diagonal.
For the supplies:
- Rotary Cutter
- Self-Healing Cutting Mat
- Acrylic Ruler
- Fabric Scissors
Directions
Cut & Arrange the Fabric
- Using your rotary cutter, acrylic ruler, and cutting mat, cut each pattern of fabric for the front into 12” squares.
- Wait to cut the backing until the end in case something changes, or measurements weren’t very accurate. Your cuts can be wobbly or crooked, but because of the construction, you’ll never be able to tell once it’s done!
- So now that the front pieces are all cut, arrange them to your liking and set the pieces off to the side in order.
- Or just pull random pieces and make the arrangement up as you go along!
Cut & Tie the Front of the Quilt
- Now that everything’s in place, it’s time to start tying.
- You are going to be doing this one row at a time, and then attaching all the rows together afterward.
- For each row, start by lining up the first two blocks, with right sides together.
- Cut a 2” square from two adjacent corners, and then cut 2” long strips in between.
- The strips don’t have to be a specific width, as long as you cut both layers together. I like to do about ¾” for fleece. It’s thin enough to tie easily, but wide enough that it’s not going to just fall apart if you pull too hard.
- Now tie each strip in a double knot with its counterpart on the other fabric. Once the first side is done, it should look like this.
- Grab the next square third square in that row, and match it up with the second one, again, right sides together, and repeat the process.
- Cut corners. Cut strips. Tie strips.
- Do this all the way to the end of the row.
- Once you have two or more rows done, you can start attaching two rows together at a time using the same method.
- But this time, you’re only cutting the squares out of the corner on each end. Not in between the patches.
- Cut strips and double knot them together all the way down the row.
- Keep making and attaching rows of patches until you’ve finished the front of the quilt.
Attach the Back of Your Rag Quilt
- To attach the back of the quilt, all you have to do is lay the top and bottom pieces together, cut out strips, and tie them.
- This time, since you are attaching all four sides, you’ll want to make sure the wrong sides are together.
- Cut your backing to size if you haven’t done so already.
- Then, one side at a time, cut out a 2” x 2” square from the corner.
- Cut your strips and tie the outside of the quilt top to the backing.
- When you get to a new corner, you will need to cut out another square like this.
- Once you round the corner to start tying the next side, you won’t be cutting a square. Just cut the strips so that they are even with the last know on the previous side.
- Work like this the rest of the way around the blanket.
- All done! You now have a “new” rag quilt without sewing anything!
Did you give this no-sew quilt a try? Follow CanScribe on Instagram and let us know how it turned out!